










Why Knowing Where to Place the Indoor Unit of a Mini Split Can Make or Break Your System
Knowing where to place the indoor unit of a mini split is one of the most important decisions you'll make before installation. Get it right, and your system runs quietly, efficiently, and evenly. Get it wrong, and you're looking at higher energy bills, uneven temperatures, and a system that wears out faster than it should.
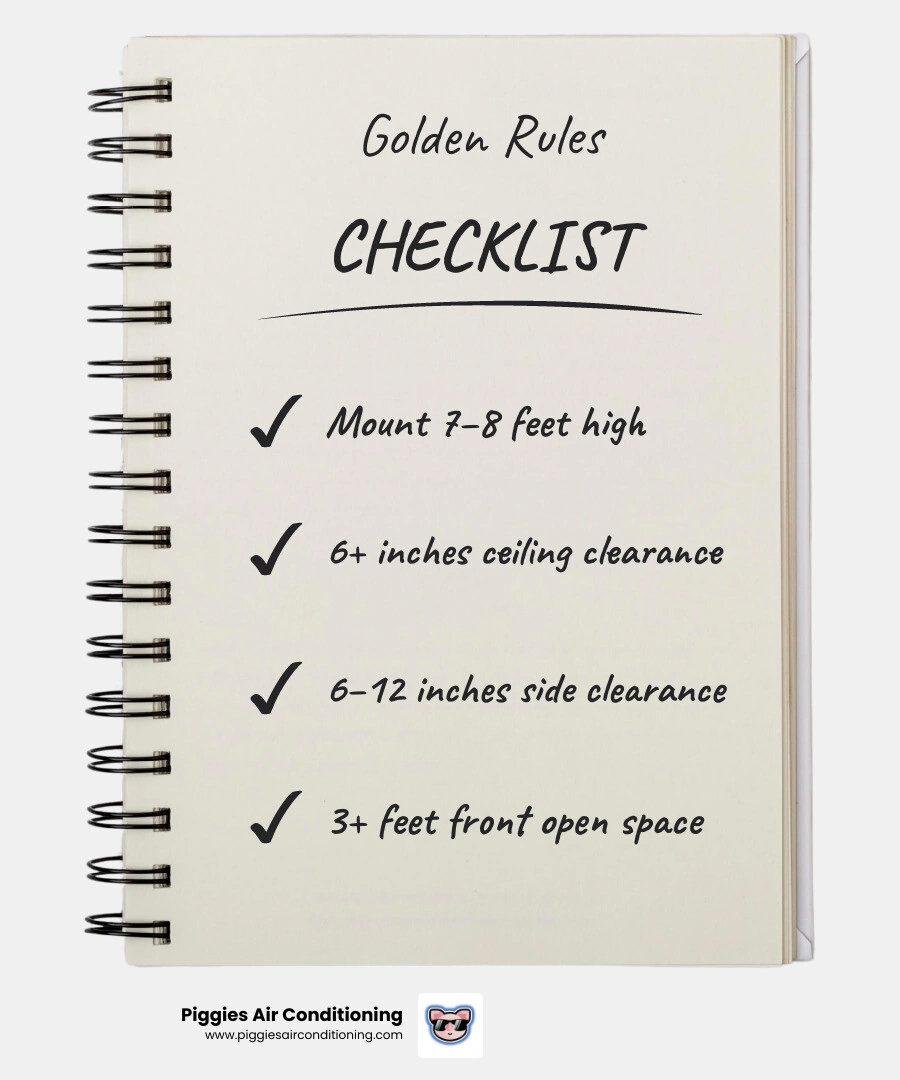
Here's a quick-reference guide to optimal indoor unit placement:
| Placement Factor | Best Practice |
|---|---|
| Mounting height | 7–8 feet above the floor |
| Ceiling clearance | At least 6 inches from the ceiling |
| Side clearance | At least 6–12 inches on each side |
| Front clearance | At least 3 feet of open space |
| Wall type | Exterior/perimeter wall preferred |
| Distance from electronics | At least 3–4 feet |
| Avoid | Kitchens, hallways, above beds, near heat sources |
According to the U.S. Department of Energy, a poorly installed air conditioner can lose up to 20% of its efficiency — and that number climbs even higher when blocked airflow is added to the equation. For homeowners in the San Gabriel Valley dealing with hot summers and rising energy costs, that's not a small detail. It's the difference between a system that earns its keep and one that runs constantly without ever quite getting the job done.
The good news? Placement is something that can be planned before a single hole is drilled.
Where to Place the Indoor Unit of a Mini Split for Maximum Efficiency
When we help homeowners in West Covina or Pasadena plan their Ductless Service, the first thing we look at is the vertical real estate. The height at which you mount your indoor air handler isn't just about aesthetics; it’s about physics.
Ideally, you want to mount the indoor unit between 6 and 8 feet (180–240 cm) above the floor. In May 2026, as energy standards continue to evolve, this remains the "sweet spot" for several reasons. First, heat rises. If the unit is mounted too low, it spends all its energy cooling the air at your ankles while the warm air stays trapped at the ceiling. Conversely, if it’s mounted higher than 7 or 8 feet in a room with standard ceilings, it can struggle to push the conditioned air down to the "living zone" where you actually sit and sleep.
| Placement Mistake | Potential Efficiency Loss | Resulting Issue |
|---|---|---|
| Blocked Airflow | 15% - 30% | Unit overworks to reach set temp |
| Near Heat Source | 10% - 15% | False thermostat readings |
| Poor Height Choice | 5% - 10% | Air stratification (hot/cold spots) |
| Direct Sunlight | 10% | Sensor "thinks" it's hotter than it is |
Optimal Height and Clearance Requirements
To ensure your system breathes properly, we follow the "6-inch rule." There must be at least 6 inches of open space between the top of the unit and the ceiling. Why? Because mini splits pull air in from the top. If you "choke" the intake by mounting it flush against the ceiling, the system has to work twice as hard to move air, which can lead to a 30% drop in efficiency.
Furthermore, we recommend at least one foot of clearance on the sides. This isn't just for airflow; it’s for us! Technicians need to be able to reach the internal components for maintenance. If you’re looking into Ductless AC Installation Pasadena, ensuring this clearance now prevents a massive headache during your first annual tune-up.
Impact on Energy Consumption
Improper placement is the leading cause of "short-cycling." This happens when the unit’s internal thermostat gets "tricked." For example, if the unit is tucked into a tight corner, the cold air it blows out might bounce off a nearby wall and get sucked right back into the intake. The unit then thinks the whole room is cool and shuts off, only to turn back on two minutes later when it realizes the rest of the room is still 85 degrees.
This constant on-and-off cycle is an energy killer. If you've ever wondered Why Mini Split Could Be Blowing Warm Air, short-cycling due to poor placement is often a prime suspect.
Mounting on Interior vs. Exterior Walls
One of the most frequent questions we get in San Marino and Arcadia is whether the unit must go on a wall that leads directly outside. The short answer is no, but there are trade-offs.
Exterior (Perimeter) Walls: This is the gold standard. When we mount a unit on a wall that faces the backyard or side yard, we can drill a small 3-inch hole directly behind the unit. The refrigerant lines, electrical wires, and—most importantly—the condensate drain line can go straight out. This allows gravity to do the work of draining the water that your AC removes from the air.
Interior Walls: You can absolutely mount a unit on an interior wall, but you’ll likely need a condensate pump. Since water won't naturally flow uphill or through several rooms to get outside, a small pump is installed to push that water out. While effective, pumps do add a bit of mechanical noise and are another part that will eventually need maintenance. If you are considering Ductless AC Installation West Covina, we'll help you weigh the aesthetic benefits of an interior wall against the simplicity of a perimeter mount.
Challenges of Interior Wall Access
When you move away from an exterior wall, the "line set" (the copper tubing) has to travel further to reach the outdoor condenser. While modern systems can handle distances of 100 feet or more, there is a slight drop in efficiency for every extra foot of tubing. We also have to think about how to hide those lines—whether that’s running them through an attic, a crawlspace, or using decorative line-set covers. For a Mini Split Replacement San Marino, we often look for creative ways to preserve the home’s historic character while modernizing the HVAC.
Where to Place the Indoor Unit of a Mini Split in Bedrooms and Offices
In a bedroom, the goal is "indirect airflow." You might think placing the unit directly over the headboard is a good idea, but many people find the sensation of cold air falling directly onto their face to be uncomfortable or even irritating to their sinuses.
The better move? Mount the unit on a side wall or opposite the bed, so the air circulates in a "comfort bubble" around the room. The same applies to home offices. If you’re doing a Ductless AC Installation Arcadia, avoid pointing the unit directly at your desk or computer monitors, as the temperature fluctuations can actually be hard on sensitive electronics.
Critical Areas to Avoid During Installation
There are a few "danger zones" where we almost never recommend installing a mini split.
The Kitchen: This is a big one. Kitchens are full of heat and, more importantly, airborne grease. If you install a unit near a stove, that grease will be sucked into the filters within weeks. This clogs the coil, makes the unit smell, and eventually leads to mechanical failure. If you must have cooling in the kitchen, we suggest placing the unit in an adjacent dining area and "throwing" the air toward the kitchen.
Direct Sunlight: If the sun beats down on the indoor unit’s casing, it can heat up the internal sensors. The unit will "think" the room is 90 degrees even if it’s a comfortable 72, causing it to run unnecessarily and waste electricity. This is a common issue we see during Mini Split Replacement Pasadena calls where the original installer didn't account for afternoon sun exposure.
Avoiding Heat Sources and Obstructions
Keep your mini split at least 3 to 4 feet away from TVs, radios, and microwave ovens. Mini splits use electromagnetic components that can occasionally interfere with signals, and the heat from a large plasma or LED TV can skew the unit's temperature readings.
Also, watch out for "tall furniture." That beautiful bookshelf or armoire might look great, but if it sits right under the mini split, it will block the air from reaching the rest of the room. Our Arcadia Ductless AC Installation Guide emphasizes that a clear line of sight is required for the best results.
Where to Place the Indoor Unit of a Mini Split to Avoid Short-Cycling
One of the biggest mistakes we see is the "Hallway Ghost Trap." Homeowners often try to save money by putting one large unit in a hallway, hoping it will cool three adjacent bedrooms.
It almost never works. Cold air is heavy; it sinks to the floor of the hallway and stays there. The unit’s sensor (located in the hallway) quickly reaches the target temperature and shuts off, while the bedrooms remain stuffy and hot. For a truly comfortable home, it’s always better to use a multi-zone system with smaller heads in each room. Check out our West Covina Mini Split Install Complete Guide for more on why zoning beats "the hallway method" every time.
Professional Installation Strategies for Southern California Homes
In the San Gabriel Valley, our climate presents unique challenges. We have high heat, but we also deal with Santa Ana winds and occasional dust. This makes the placement of the outdoor unit just as vital as the indoor one.
For multi-zone systems, we try to place the outdoor condenser in a central location relative to all the indoor units. This keeps the refrigerant lines as short as possible, which maximizes efficiency and reduces the amount of refrigerant needed. We also ensure the outdoor unit is on a level, elevated pad to prevent vibration noise and protect it from ground moisture. This is a standard part of any Ductless Heat Pump Install La Puente.
Sizing and Load Calculations
We don't just guess where the unit should go; we use a Manual-J calculation. This is a professional load calculation that takes into account the square footage of the room, the height of the ceilings, the quality of your insulation, and even the direction your windows face.
A room in Yorba Linda with massive south-facing windows needs a different placement strategy than a shaded basement in Glendora. We look at your furniture layout to ensure the "throw" of the air handler covers the areas where you spend the most time. If you're ready to Install Ductless HVAC West Covina, we'll perform these calculations to ensure your system is perfectly sized.
Managing Multi-Zone Coordination
In a multi-zone setup, the indoor units need to work together. If you have two units in a large, open-concept living area, they need to be placed so they don't "fight" each other. If one unit's cold air blows directly onto the other unit's sensor, the second unit will shut down prematurely.
Coordination is key, especially when you want the flexibility of simultaneous heating and cooling in different parts of the house. This is a common request during Ductless AC Installation Yorba Linda, where large floor plans are common.
Frequently Asked Questions about Mini Split Placement
What is the ideal height for mounting a mini split?
The ideal height is 7 to 8 feet from the floor. This allows the unit to take advantage of natural air convection. If you mount it too low (below 5 feet), you waste energy cooling the floor. If you mount it too high (above 9 feet in a standard room), the air may not circulate effectively down to the floor level. For more on the basics, visit our Mini Split page.
Can I install a mini split on an interior wall?
Yes, you can. However, it requires more planning for the drainage. Since you won't have a direct path to the outside, we will either need to run a drain line through the wall/attic with a specific downward slope or install a condensate pump. If you're in the planning stages, a Ductless AC Installation Pasadena CA consultation can help determine the most cost-effective path.
How much clearance is needed around the unit?
At a minimum, you need 6 inches of clearance from the ceiling and 6 to 12 inches on the sides. You also need at least 3 feet of clear space in front of the unit. Never hide a mini split behind curtains, valances, or inside a decorative "box" unless it was specifically designed for HVAC airflow. If you're replacing an old unit, our Mini Split Replacement Arcadia team can help you relocate it to a spot with better clearance.
Conclusion
At Piggies Air Conditioning, we’ve spent years perfecting the art of HVAC in the San Gabriel Valley and West Covina. We know that where to place the indoor unit of a mini split is a decision that stays with you for the next 15 to 20 years. That’s why we don't just "slap it on the wall" where it’s easiest for us. We look at your lifestyle, your home’s architecture, and the local climate to find the perfect spot.
As a certified Daikin Comfort Pro dealer, we stand behind our work with a 12-year full replacement and labor warranty on Daikin units. Whether you’re in Alhambra, San Dimas, or Whittier, we’re here to ensure your transition to Ductless technology is seamless, efficient, and—most importantly—comfortable.
Ready to find the perfect spot for your new system? Give us a call today!
Other blogs


Customer Testimonials



CUSTOMER SERVICE!
I highly recommend this company for anyone needing AC repair or maintenance. I'll definitely be calling them again for any future needs!

I had the pleasure of experiencing outstanding service and professionalism from Ruben, and I am beyond impressed. From the moment I first contacted them, by phone and follow up communication via email for my quotes. The attention to detail and commitment to excellence were evident.
Ruben, was incredibly responsive, addressing all my inquiries promptly and with clear, thorough explanations. Their dedication to understanding and meeting my needs was remarkable.
Ruben, went above and beyond to ensure that everything was handled seamlessly, demonstrating not just professionalism, but also a sincere dedication to customer satisfaction.
I can't recommend Piggies air Conditioning/Ruben highly enough. If you're looking for someone who combines expertise with exceptional service, look no further. They are a true example of what outstanding professionalism should be.
The technician arrived on time, which I really appreciated given how crucial air conditioning is in this heat. Ruben was professional and friendly, explaining what he was doing throughout the process. The issue I had was diagnosed fairly quickly, and they provided me with a few options on how to fix it. The pricing was transparent, and I didn't feel like there were any hidden costs, which is always a plus when it comes to service calls like these. Highly recommend this company!
1st & foremost, huge shout out to Ruben thank u so so much for reaching out & making things happen SO FAST! I was so surprised since i had reached out to a couple different places who lagged on even answering calls, messages, etc.
Ruben was also very informative & taught me ALOT that i didnt know about.
Also cant leave the amazing Luis & Miles out of
this review.
They came, they saw, they conquered!
And they worked pretty swiftly too, felt very comfy around em, loved their personalities, great attitude, work ethic, professionalism, had some really good convos & they still got the job done lightning fast
SUPER HUGE SHOUT OUT & THANKS for everything guys! Definitely recommending u guys to everyone i know.
recommendations and feedback. The actual installation was painless and unremarkable, his AC experts got it done, got it cleaned and most importantly got it right. Rueben even went a step further to assure we had
protection from the coming rain, that is service unheard of these days. His price was competitive and a REAL value for the service we recieved. Using anyone else for your AC needs, would be a huge mistake. We thank them again and will recommend to everyone.
Echoing a lot of the other reviews here, Piggies Air Conditioning responds so quickly to requests (even though I actually accidentally sent in multiple requests on my side without responding, oops!)
They were able to come do a FREE energy audit and initial inspection on the same day and Ruben was amazing at explaining his thoughts on our house's situation and what he thought was worth the money and wasn't worth the money.
I truly felt like he was trying to help me find the best solution to our issues instead of just trying to upsell us on everything and anything.
I'm definitely recommending this business to anyone I know if they want a trustworthy and realistic service, value, and quality.